How Leather is Made: The Tanning Process
Updated
You can’t make leather without tanning it, but you can tan it without coloring it. You also can’t wear or carry animal hides for very long without them rotting if you don’t tan them. Tanning changes the protein structure of the animal hide to arrest the decomposition process and transform into a durable material. We’ll talk here about the process of turning animal hides into leather and the advantages or disadvantages of each method.
Note that we are discussing industrial tanning methods in this post, where most of the leather for your wallets will come from, not DIY-ers preserving their own skins.
Historical Tanning
Before we describe the practices of modern tanneries, let’s see how far we’ve come by briefly reviewing the processes of the ancients. Spoiler alert: It was disgusting.
Animal hides were shipped to the tannery with no prior preservation considerations. They were covered in dirt and blood, already stiff and rotting. The tanner would have to soak the hides in water to clean them and restore malleability. Then they had to scrub away any remaining fat or tissue from the underside of the hide.
Next, they would soak the hide again, but this time in human urine. Why would they do this? To remove the hair. The more sanitary tanneries simply let the hides rot for a few months. When the hairs were loose enough, they scraped the hide with a knife to produce a smooth surface.
After they removed the hair, they had to soften the hide into a workable material. To accomplish this, they pounded animal feces into the hide or soaked it in diluted animal brains. The bacteria growing in the feces or brains fermented the hides, allowing them to last longer.
Finally, the tanner would soak the material in a tanning solution of ground up bark. The type of bark that they used, and how long they soaked the material, determined the color of the leather. The word “tannin” originally came from the word for a certain type of tree, but tanners realized that they could customize the color of their leathers by mixing different barks and plant materials. The acidic tannins dyed the material and made the leather more water resistant.
The actual tanning process wasn’t harmful, but the use of so many foul-smelling materials preparing the hide for tanning is what relegated tanneries to the outskirts of towns. It also shows why tanners were few and far between despite the high demand for leather.
Modern Preservation
Modern tanning methods start by preserving the hide for leather making. Leather is an $85 billion industry worldwide and preserving the hides for sale is a large consideration for livestock ranchers. The healthier the hide, the higher the price ranchers can charge to tanning facilities.
At the slaughterhouse, the skins are removed while the carcass is still warm, not allowing any time for bacteria to infect the skin. They then preserve both the meat and the skins separately by curing them in salt or freezing them. Salt removes moisture from the skins, preventing bacterial growth while freezing inhibits bacterial growth by lowering temperatures beyond that at which bacteria can survive. Salt curing can be accomplished with dry salt rubs or soaking them in saltwater, a process known as brining.
Brining takes less than a day while dry-salting takes a month. The trade-off is that you can hang more skins vertically with dry-salting than you can fit horizontally in salt baths. Depending on space and productivity needs, a slaughterhouse or curing facility might use one or the other. They also might freeze the skins and ship them directly to the tannery.
Depending on their supply and production needs, a slaughterhouse, curing facility, or tannery might preserve the hides for up to a month before processing them.
Preparing the Hide
Thankfully, modern tanners don’t need to use urine or dung to prepare skins for tanning. They do, however, need to follow many of the same steps that the ancients did.
Soaking with anti-bacterial and anti-fungal agents. First, when they receive the skins from the slaughterhouse, they soak them in clean water to wash away the salt applied for preservation and to infuse the hide with moisture. Skins that are too dry are too brittle to work with. They’ll also add anti-bacterial and anti-fungal agents to the bath to prevent the growth of bacteria and mold. Tanners will keep the hides in this soaking solution for a day or two.
Liming. After water soaking, tanners treat the skins with milk of lime. Milk of lime is a very basic agent that raises the pH of the hides. The rise in pH helps to weaken the hair follicles and prepare the hide to accept acid tanning agents. Liming can be done as part of the initial soaking process to save time.
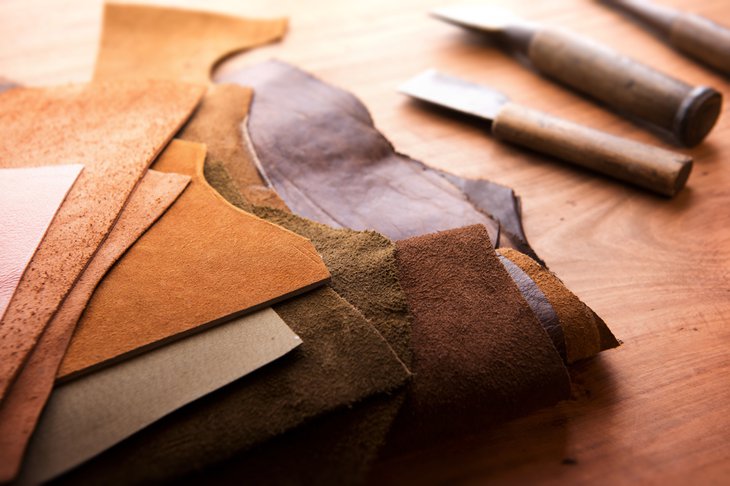
Splitting. Most hides are too thick (approximately 4mm) to work with if left intact. Tanners run the hides through a splitting machine to separate the top and bottom layers. The top layer can then made into full-grain or top-grain leather while the bottom layer can be used to make “genuine” leather, suede, or nubuck.
Hair removal. The hides are then salted again and run through a machine to rub the hair off. This is a delicate process, especially when a tanner is producing full-grain leather, as they need to be careful not to damage the skin. They then scrape or pluck any remaining hair by hand.
De-liming. Tanners raise the pH of the hides to remove hair and prepare for tanning but then need to lower the pH to soften the skins. They soak them in a slightly acidic solution and add purified enzymes to help make the hides more malleable.
Pickling. Tanners then soak the hides again in salt, and then in sulfuric acid to prepare them for the actual tanning process.
Though there are many steps, lowering and raising the pH of the skins is the modern advancement that helps tanners process each hide much quicker and in more sanitary conditions than their ancient counterparts. Without these time-saving steps, processing one hide would take a month or more, with many hours spent kneading and de-hairing the skin in between soaks.
Tanning Methods
Tanning does color the hide, but dyes might also be used. Tanning primarily arrests the decay of the hides by infusing them with chemical agents known as tannins. The tannins remove water content and tighten the hides. The hides are soaked in a solution of these tannins for 8-16 hours, depending on the method, after which they can appropriately be called leather.
There are three main tanning methods: vegetable tanning, chrome tanning, and brain tanning, with variations of each. As you can imagine, brain tanning is no longer a popular choice among industrial tanneries, so most of your wallets will feature chrome (mineral) tanning or vegetable tanning. A tannery might also use a combination of chromium and plant materials in their tannin solution to deliver the benefits of both methods.
The hides must have a high pH to accept the infusion of the acidic tannin solutions.
Vegetable tanning. As we discussed above, tanning received its name from the bark of a certain tree. What that original tree was, or if it was one tree specifically, is unknown. Modern tanneries, however, still use bark tanning along with other plant materials. The type of material used will determine the undyed color of the leather as well as how water-resistant it is. Some types of plant tannins also help make the leather more durable.
A down-side to vegetable tanning is that the types of tannins used to create a dark, natural-looking leather are not the type used to provide water resistance or durability. To use these more beneficial tannins while also delivering attractive leather, the tannery needs to then dye the material and re-tan it. Otherwise, the natural result will be a light yellowish-colored leather, not at all the rustic appearance we’re used to in a leather wallet.
If the leather has been split into layers, the process can take up to 16 hours to fully penetrate an animal hide, days if the hide has not been split. The process produces very tight leather. Because it does take longer, vegetable-tanned leather will probably cost more than chrome-tanned leather.
Chrome tanning. More correctly known as chromium tanning, this is a much faster method of tanning leather. In 1840, the medical industry began soaking sutures in chromium. Sutures were made of animal intestines and soaking them in chromium slowed the body’s ability to break down the sutures. The sutures, or stitches, would last longer inside the body to provide for a more complete healing period. Tanners realized that they could use the same solution to preserve animal skins.
Chromium tanning takes about 8 hours, after which the leather will be bluish-gray in appearance. Tanners call it wet blue. Unless tanners are combining chromium with plant tannins, chrome-tanned leather will need to be dyed. The leather that you receive from chromium tanning is more malleable than vegetable-tanned leather, so it stretches nicely when creating leather goods.
Note that alum (aluminum) tanning is very similar but not as efficient and produces whitish-colored leather. Because it is less efficient, alum-tanned leather will come at a premium price.
Brain tanning. Though not a popular or economical choice, some DIY-ers and small tanneries do use brain tanning to produce their leather. They boil animal brains into a soupy mixture, spread the solution on the leather and then allow it the solution to soak in for 24 hours. Afterward, they smoke the hides and dye them as desired. Soaking and smoking allows the oils in the brain to penetrate the hide and then set. It is a conservationist method of using more of the animal, but is not an efficient method for large-scale production and does not provide any benefits over chromium or vegetable-tanning.
Fat Liquoring, Grading, Shaving, Re-Tanning
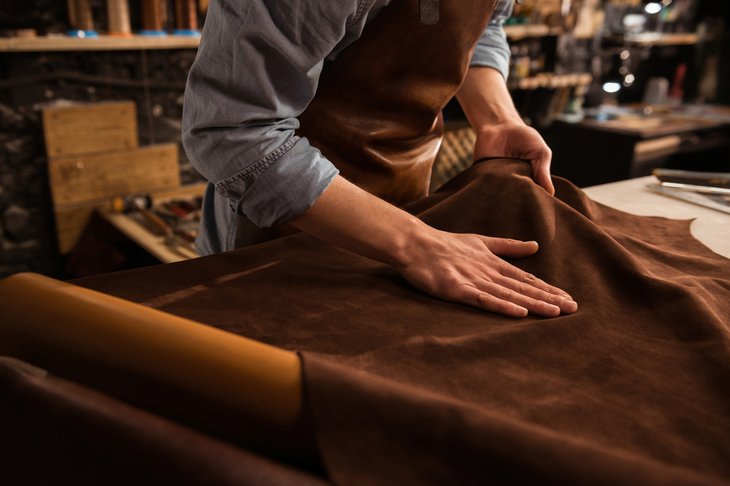
Because the preparation and tanning stages do remove so much moisture from the hides, tanners spread fats onto the leather to soften and preserve it. It could be animal fat or vegetable oils. The leather is then pressed to remove excess moisture, and graded for quality. They will then shave the hide to make each piece of leather the same thickness. Finally, they will re-tan the leather to ensure a thorough application of the tannin agents. They might also bleach the leather during the re-tanning process if they intend to dye it.
After re-tanning, the leather is pressed again and then dried in an oven, by air, or with an industrial wet-vac. When dry, tanners will soften and stretch the leather by machine or hand, working the leather back and forth across a curved surface to make it flexible.
Dyeing and Finishing
Dyeing. Unless the leather was tanned with a dark, plant-based tannin, the material will need to be dyed. Tanneries use oil, water, or alcohol-based dyes. Like tanning, they soak the leather in the dye for eight hours and then take a cutting of the material to ensure that the dye has soaked all the way through the leather. Once the leather has been dyed (maybe that cute pink shade you want for your wallet), the leather is vacuum or air dried again and is ready to be finished.
Finishing. The finishing process provides malleability, texture corrections, and sheen to the leather. Note that full-grain, suede, and nubuck will skip some of these steps.
First, it is tumbled and stretched by machine for 4-8 hours to soften the leather. Then, a top coat or gloss might be applied to the leather. Low-grade genuine leathers rely on a thick topcoat to provide the appearance of leather. The materials are then baked in a low-temperature oven for 4-8 hours to cure.
After curing, the leather might be pressed to emboss it with an artificial texture or grain. This is an important step for top-grain and genuine leathers. Finally, the leather is ironed to create a glossy sheen in varying degrees.
Final Production
Once the tannery is finished with the leather, they sell it to leather suppliers (for DIY-ers) or directly to factories. Some tanneries are part of a leather goods manufacturer and so are supplying the leather for use in their own company.
The most marketable finished goods manufacturers and crafters will be open about the entire process of where their leather came from and how it was finished. You don’t need to know all the details, but knowing the type of hide, the main tanning process, and grade of leather is important for deciding how durable and how expensive you should expect a wallet to be.
Featured Reviews

Best Passport Wallets For 2018
The 5 best passport wallet designs. Rated for materials and durability, capacity and convenience, and overall price value.

Men's Credit Card Wallets
The top 5 men's credit card wallet designs for durability, design, and price. Full-grain leather to polycarbonate shells.

Money Clip Cardholder Wallets
Comparing the best leather money clip card holder models from $8.95-95. Full and top grain to genuine leather. Carrying capacity and color options.
Recent Reviews

Best Trifold Wallets For 2018
A review of the top 5 trifold leather wallets with vertical pockets. Want to know which wallet is the best value for 2018? Check out this article to find out!

Best Bifold Money Clip Wallets
The 5 best bifold money clip wallet designs rated for durability, design convenience, purchase options, and value.

5 Best Bifold Vertical Wallet Designs
The 5 best vertical bifold wallet designs rated for material durability, design, capacity, convenience, and value.

Best Leather Key Holder Designs
Best leather key holder models for back pocket, front pocket, and keychain designs. Reviewed for durability, design, style, and value.

Best Passcase Wallet 2018
The 5 best passcase wallet models rated for material quality and durability, capacity, purchase options, and value.

Waterproof and Water-Resistant Wallets
Looking for a waterproof wallet? Water-resistant wallet? Here are the top 5 choices tested and reviewed.

Best Wallet Inserts
The best wallet inserts for double high, bi-fold, and trifold wallets. Rated for durability, capacity, and value.
Recent Articles

Where Wallets are Heading
These 8 modern wallet designs are certainly interesting looking. Which ones do you like?

The Most Useful Wallet Accessories
What’s in your wallet? You might want to add a couple of these credit card-sized accessories or give them as gifts.

Why We’ll Always Need Wallets
The pros and cons of using mobile wallet apps and a rundown of 6 of the most popular options.

What is a Passcase Wallet?
Learn what a passcase wallet is, what it’s good for, and what to consider when buying one.

The Most Useful Features of a Wallet
We’re evaluating everything from chain rings to coin pouches, pull-tabs to passcases.

How To Identify A Quality Wallet
Can you tell the quality of leather by smelling it? To some degree, you can. Check out this article to find out how to identify a quality wallet.

How to Keep Your Wallet Safe
Protect yourself by not being an easy target, securing your wallet, employing easy recovery methods, and using RFID blocking wallets

Faux Leather – Any Good?
How does the quality of faux leather compare to real leather? How is it made? How can you tell faux from authentic?

How to Reduce the Contents of Your Wallet
Tech-friendly and no-tech methods to permanently reduce the contents of your wallet.

Leather Economics - A Global View
Leather economics and trading on a global scale. This article provides a brief glimpse into the economics of the leather industry and the most common trade routes for the unfinished and finished goods.